Sunday, December 26, 2010

Hello everyone! I hope you had a wonderfully blessed Christmas with your families! I know I did. I cherished each moment spent with my extended family as for my Grandmother is pretty positive it is her last. So I savored every moment, laugh, every hug, and bite of my grandma's cooking and I am basking in the warmth of it all! I must say I am chomping at the bit though, to get started scrapping all my photos, what about all of you?
So without further adieu...... I am going to show you how to create a circle that you can use as a background on a layout, element, or frame. I will be using mine today as a frame. I am using Photoshop CS2 but from what I heard you can also do the same steps similarly in Elements. So lets get started!

Go to File and open whatever paper you want to use. I chose to use the swirly one.
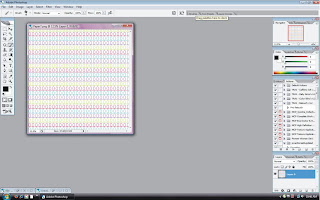

Next, Go to the Marquee tool on the tool bar to the left, and make sure you have it set to the circle marquee.
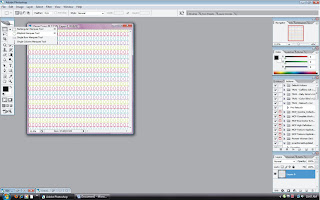
Now make a circle to your desired size. Also at this time you will want to go to File and create a NEW document and make sure it is 12 inches by 12 inches. Also make sure your resolution is always set to 300 pixels/inch!
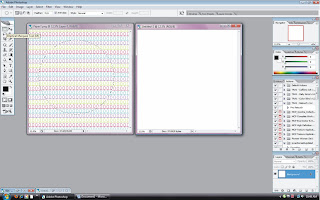

Next, make sure you are back onto the circle image and you will want to click on the move tool (Arrow) and then hold it down on your circle, you will see a little pair of scissors show up and move the circle to your layout(if you want to use it)or delete it as I have.
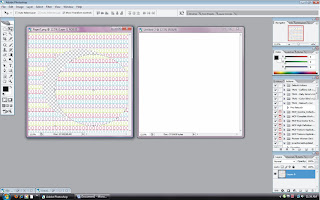

Go back to your marquee tool and make another circle, outside of the deleted one. Now, go to the move too and move the new circle to your layout or new document.
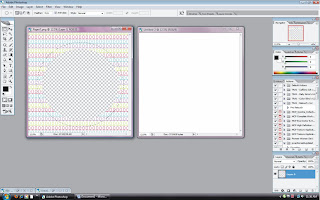

On the New Doc or Layout as I like to call it, you can change the size of the circle to whatever you desire. One little tip to help you keep the dimensions locked is to hold down the shift key as you are using the mouse on the perimeter sizer to make it the size you want. * I also at this time, picked a paper (teal) for my main background. You can use just the one or you can picked new papers and repeat the steps to make more circles. Have fun with it, try shadowing or embossing them by going to the Layer tab and clicking on Layer Style.
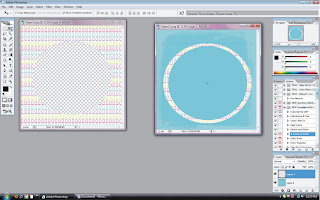

Finally, build a layout as you like. You can create multiple circles or use the one as a frame as I did!
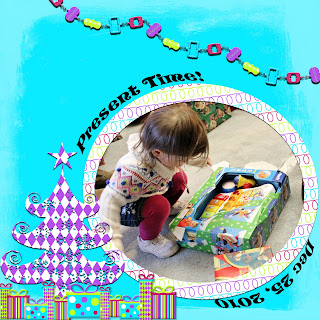

Whatever you do, I hope the tips in here will help you and also give you a few ideas!
I hope you had a wonderful Christmas with your families and enjoying yourselves! Have a safe New Year!!!

Your friend,

Friday, December 24, 2010

On the 12th Day of Christmas:

LP gave to me:


12 papers from the Santa Baby line!!!


DOWNLOAD HERE

MERRY CHRISTMAS FROM LP!

Photobucket

Thursday, December 23, 2010

Wednesday, December 22, 2010

Tuesday, December 21, 2010

Monday, December 20, 2010

Tutorial- 3D Pop Up Cards digital

Today I’m going to show you how to make 3D pop up Cards digitally!!!
I use a different program than most people, StoryBook Creator 3.0 Plus.  I’m sure that you can take the basic techniques and use them for the program that your using.

We will be starting off with a 12x12 blank page.  You will be creating 4- 8”x4” rectangles. 3 will fit horizontally and one will be vertical.  There will be a square in your upper right hand corner.  You can use that square to make a tag if you wish. That is what I did!!


Lets start with the first rectangle top left.  We are going to basically cut your rectangle in half.  The way I did this is by using my Cut and Fill Option.  I made a rectangle around the bottom half of the rectangle, and you CUT AROUND THE SHADED AREA. In other programs this might be the select tool? This will make you have 2 smaller rectangles now. See the next 2 pictures.


So now that you have the 2 smaller rectangles you are going to fill the bottom one with your choice of paper.  I used papers from the Santa Baby Kit. For this first card I chose the pink paper.  That will be the bottom half of your card.


Now you will import/add embellishments to your liking.  I used the embellishments from Santa Baby to match the paper I took from the kit.  Just remember that you want to have half of the image to be off of your paper rectangle. Just like the picture below

Don’t forget to add shadows if you want to POP it off the page more.
Do any personalization at this point too.  I wanted my plain pink paper to have some texture so I added that at this time too.  If you use SBC+ and would like to learn how to do this just send me a message and I can help you out.

Now after you have finished placing everything were you want you will erase the grey box at the top.  You will now repeat all the steps again for every card.  When you are all done, Print them out.  I send mine into Costco because that is the cheapest place I have found to print them.  Plus I do not have a 12x12 printer!!

After you have printed this out.  You will now have 2 options for cutting and mounting onto cardstock.  You could cut around the tops leaving the white part attached to the rest of your card. Just like i did with the snowman card below. Or you can cut around everything even eliminating the white off the card.  like i did with the "Holly Jolly Santa" 


 Now just depends on what you did with your cutting will depend on what you do next.  If you cut everything off then you will need to cut a piece of white cardstock 4"x8" and score it at 2" on the 4" side.  You will then glue the card onto the cardstock.  (picture is below).  If you decided to just cut around your image you will need a piece of cardstock 2"x8" to glue onto the inside back like the picture below. Your basically trying to cover the hole were you cut the image out of with the cardstock. 


Finish doing this to all the cards.  I chose to cut the white off of my cards it seemed to be easier to do that then take an exacto knife and cut around the image. 
Here are all 4 of my cards done, with a nice tag to match.  


All the digital product used was from the Lollipop Press, Santa Baby Kit. The cardstock i used for the bases of the cards is from CTMH.  


On the 8th Day of Christmas

LP gave to me:


8 Snowflake brushes


DOWNLOAD HERE


Photobucket

Saturday, December 18, 2010

On the 6th day of Christmas

LP gave to me:

A new double LO sketch with for 6 pictures!! (just right click and copy to your computer to save)


Photobucket

Friday, December 17, 2010

On the 5th day of Christmas

LP gave to me:


5 Holiday button brushes! (they are actually embossed, you just can't tell by the jpg. lol)


DOWNLOAD HERE


Photobucket

Tuesday, December 14, 2010

Monday, December 13, 2010

On the First Day of Christmas...

LP gave to me:


A brand new double LO sketch!


and an example using LP product:


Photobucket

Technique: Polka Dot Paper by Erin Ostgulen

To create your own polka dot paper follow these steps below. It's actually easier than you'd think!

1. Create a new 12" x 12" white document and a 1" x 1" white document by going to "File" then "Ne
w" and changing the sizes to above.
2. Click on the 1'' document and use the Ellipse tool to create a circle by holding down the shift key as you draw it. Then rasterize the circle layer by right clicking on
the layer and clicking "rasterize layer". Also, delete the white background.

3. Click "Edit" then "Define Pattern". Name the pattern whatever you want.


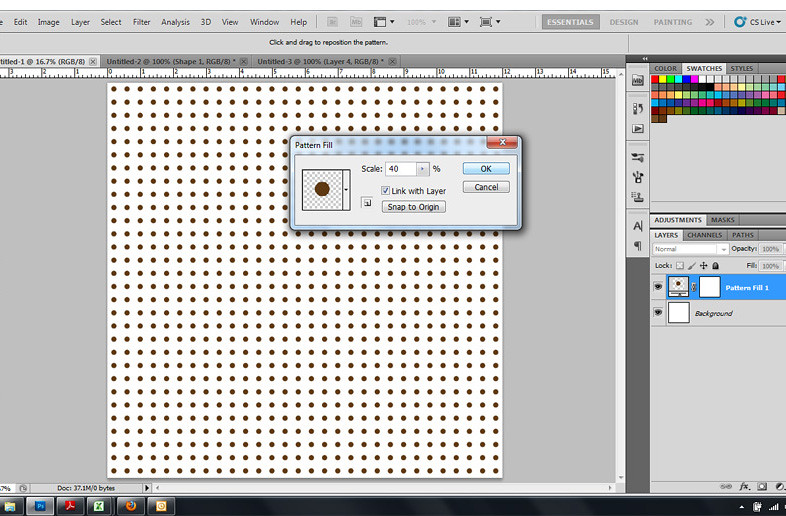
4. Switch over to the 12" x 12" document. Click "Create New fill or adjustment layer" in the layers pallete then click "Pattern." Adjust the scale to your liking. I chose 40% because it fit the dots on the page perfectly. You don't want dots cut off on one side and not the other.

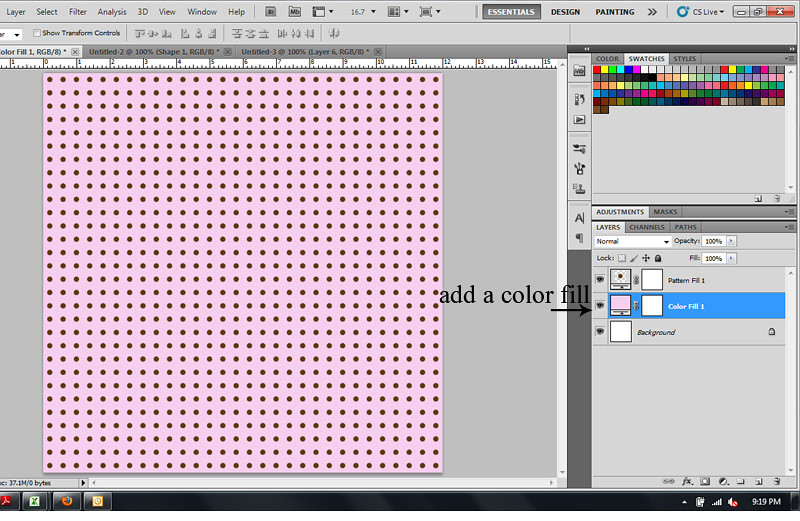
5. Next, you can add a background color (Click "Create New fill or adjustment layer" in the layers pallete then click "Solid Color." Choose the color you'd like with the color picker) or change the opacity of the dots. It's all up to you!
6. Flatten image and save as a jpeg. And you have made your first polka dot paper like mine below! It's ready to be pulled into any 12" x 12" layout. Enjoy!