
To start with, I printed out all the patterns I wanted in the card on 3 ½ x 5 pieces of paper. The paper I am using is from the new November line called DAPPER MAN.
You can see from the above picture that I also printed my Digi stamp on the papers. I have 10 copies of the stamp and 1 with no DIGI stamp for BACKGROUND layering. Here is a closer shot so you can see all the patterns and all the printed images.
Usually when I am doing a card or project this way, I usually print out my DIGI image on WHITE paper and use that one as my BASE. You can see my BASE in the middle of this image.
Grab all you supplies or have them close at hand. Here are most of the basics I used.
You will also need some ink and sponges for shading your pieces.
Additionally have your card base and envelope chosen with some nice coordinating ribbon. I am using some older Stampin’ Up! Ribbon, I have no idea if they still sell this pattern.
Now it is time to decide what paper you want to be what piece. Here are all my pieces cut out and ready to go.

You can see how small some of the pieces are, I have put a dime in the picture so you can get an idea of their size.

Note to self: Even though you might be tempted, do not throw your scraps away, not matter how small they are. You never know when you might have misplaced a small piece.
After all your pieces are cut out..start sponging and shading!
2nd Note to self..when you are done…sponging…wash the ink off…you are next going to be working with WHITE paper. (I give you this advice from experience!)
It is time to start assembling. Look at your image and try to see the image in LAYERS. What will go on the bottom, some pieces work best on top, some on the bottom, it just depends on your image. Here, the wings will be my bottom layer.
Do not worry if there is a small gap. Sometimes your printer can do strange things…you just fill in the white space with a skinny sharpie and these gaps will go away. My stylus is pointing to the gaps I am talking about, which will not be visible in the final product.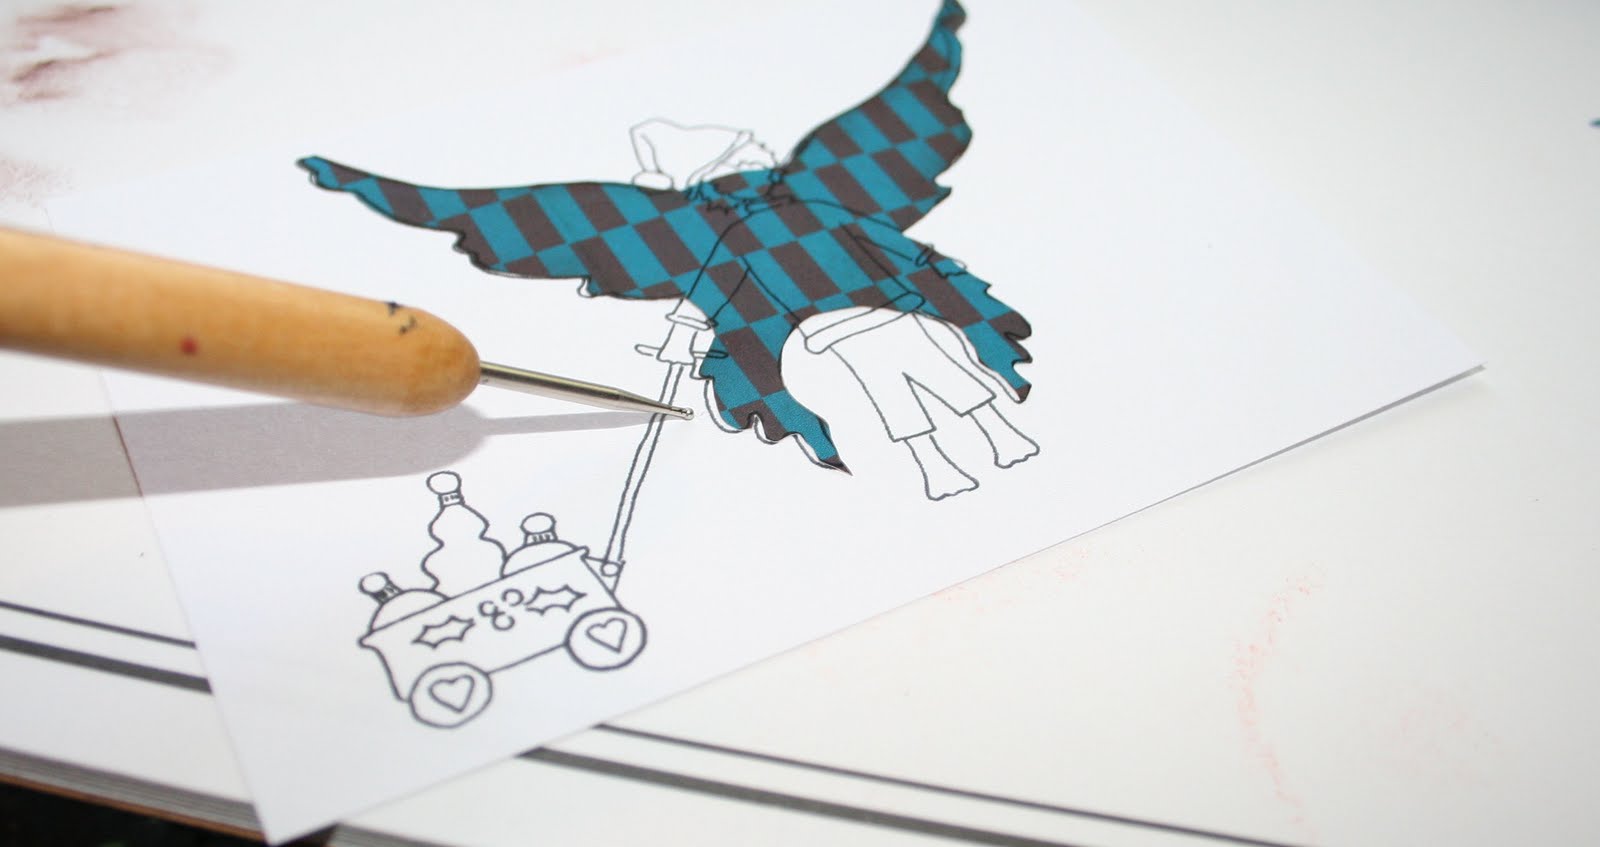
At this point..you just keep adding your layers. It is like putting a puzzle together. I love this!
Ok, here is little ELVIE all dressed up in her DAPPER MAN duds! He is ready for spot on the card!

Here is the card all assembled with some more DIGI paper and some coordinating ribbon and buttons.

Now, add a nice phrase on the inside, and you have got one great looking, one of a kind card. 
I hope you liked this technique. I want to thank Therese Travis of http://www.etsy.com/shop/paperfacesdesigns for allowing me to use Fairy ELVIE in this project.
WOW! that's really amazing!
ReplyDeletecan't believe you cut all that out. Great details and instructions too ;)
Thanks Carol! Yep some of those pieces are pretty tiny!!
ReplyDeleteGreat tut!! I didn't have a clue on paper piecing but now i know exactly what i'm doing. Thanks. BTW I love Fairy Elvie clothes!!
ReplyDelete