
1. Create a new 12" x 12" white document and a 1" x 1" white document by going to "File" then "New" and changing the sizes to above.
2. Click on the 1'' document and use the Ellipse tool to create a circle by holding down the shift key as you draw it. Then rasterize the circle layer by right clicking on the layer and clicking "rasterize layer". Also, delete the white background.

3. Click "Edit" then "Define Pattern". Name the pattern whatever you want.

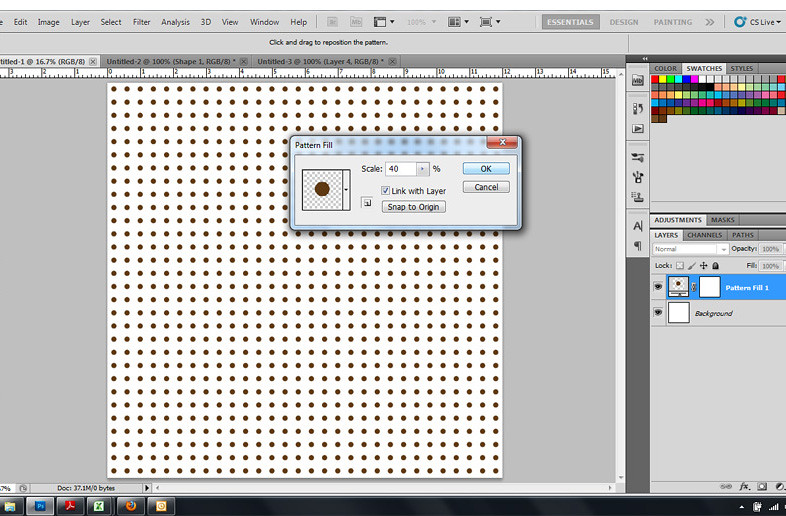
4. Switch over to the 12" x 12" document. Click "Create New fill or adjustment layer" in the layers pallete then click "Pattern." Adjust the scale to your liking. I chose 40% because it fit the dots on the page perfectly. You don't want dots cut off on one side and not the other.
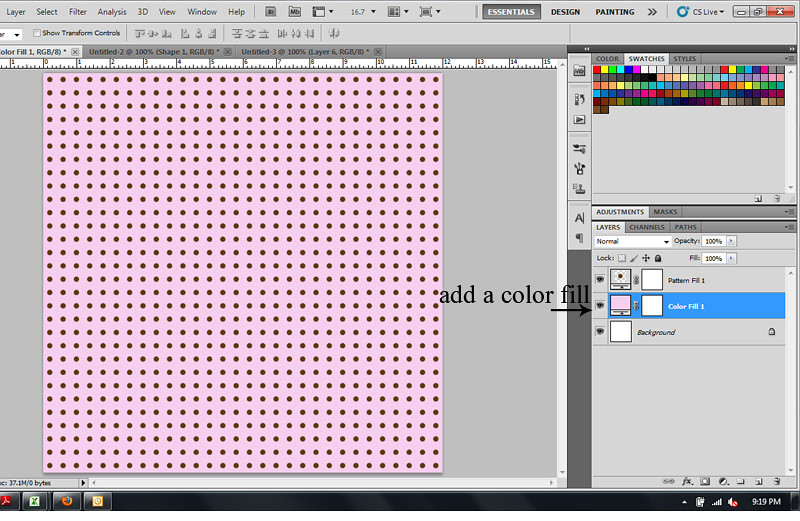
5. Next, you can add a background color (Click "Create New fill or adjustment layer" in the layers pallete then click "Solid Color." Choose the color you'd like with the color picker) or change the opacity of the dots. It's all up to you!
6. Flatten image and save as a jpeg. And you have made your first polka dot paper like mine below! It's ready to be pulled into any 12" x 12" layout. Enjoy!


so cute! Great technique girl!!
ReplyDeleteI never knew how to do this! Thanks so much, Erin! Off to create some dotted paper!
ReplyDeleteI love polka dots. Love this tutorial:)
ReplyDelete